On Making Lemonade

My daughter Josephine often sells an organic lemonade on Sunday’s at the Southampton Farmers Market. And in the City, her friends Noah and Micayla have a stand on Mercer Street in Soho where they cornered the market on one of the first 99 degree days of summer. Who can resist?
Both refreshing and satisfying – hand making lemonade is as good for the soul as it is for drinking on a hot summer day. It’s easy to do , and can be made in no time at all. Further, the customization possibilities are endless. Sliced strawberries, cherries, and even mellon balls can be added for a seasonal blend. Mint sprigs or lavender honey produce something a bit more sophisticated – maybe lending itself to a splash (or more) of vodka or even tequila.
For the best lemonade – there are a few steps to follow to guarantee a superb result.

Ingredients
12 organic lemons
1 cup sugar
Filtered water
Ice
1 – Roll the lemons between the palm of your hand and the counter – this action breaks down the fibers making the juicing a bit easier and some say it renders more juice.
2 – Cut the lemons in half and squeeze – it you have an electric juicer or a group of friends this goes faster. I use on old corning glass citurus juicer – suits me just fine.
3 – Bring 2 cups of cold water to a boil and dissolve the sugar.
4 – Add the strained juice of the 12 lemons – or simply remove the pits and keep the pulp – your choice.
5 – Add two scoops of ice to a heat stable pitcher & pour the lemonade “syrup” over ice. This will cool down the temperature of the “syrup”.
5 – Adding more cool water and additional ice to fill the pitcher.
Options (and they are endless)
• Mint springs or muddled mint
• A splash of orange juice to further sweeten the lemonade
• A hand full of berries – it gives the lemonade a pink glow.
• Sliced cucumber and/or fresh coriander
• Mellon or watermelon balls
I like to make a cocktail using fresh lemonade a few slices of serano chili and tequila – garnish with a cucumber spear & corriander. Very refreshing on a hot day.
Fava Bean Bruschetta
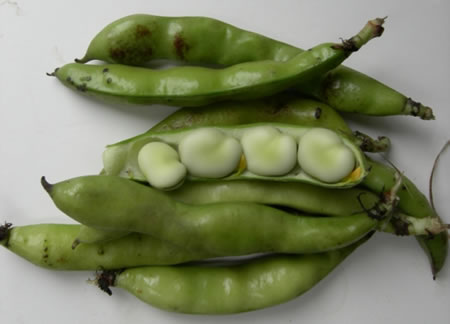
All of a sudden it hits – the markets are loaded with greens of all kinds. The bounty is overwhelming – but what I focus in on is the arrival of the Fava Beans. For me it means summer has begun.
To eat fresh Fava Beans in the early summer is the ultimate treat. They can be added to pasta or served with salt and a nice bottle of chianti as Mr Lecter may have suggested – you may want to save the liver for another day. They taste green & fresh, just perfect for a summer lunch along side a simple green salad or sliced tomatoes.
Easy to make – cooking fava beans takes some planning. You will have to peel the pods releasing the Fava Beans from the shell. I’ve had grilled Fava Beans served in the shell – but that is quite simply another recipe and should only be attempted with the freshest youngest beans. My favorite way to eat these delicious delicacies is as a brilliant green Fava Bean Bruschetta.
Fava Bean Bruschetta
2 Lbs Fresh Fava Beans
1/3 c Olive Oil plus additional oil – I prefer fresh green just pressed oil for this dish
pinch of Sea Salt
1 Organic Lemon
2 cloves Garlic
1 Baguette
1 – Shell 2 lbs of fresh Fava Beans – look for young green pods
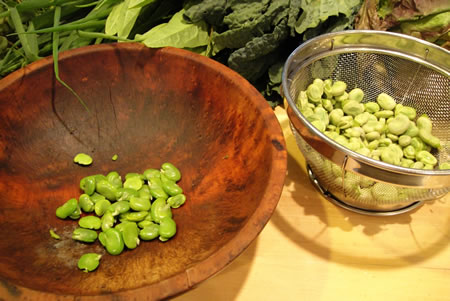
2 – Blanche the beans in a pot of salted water – a minute or two is sufficient. You want to be able to peel the beans from the shell
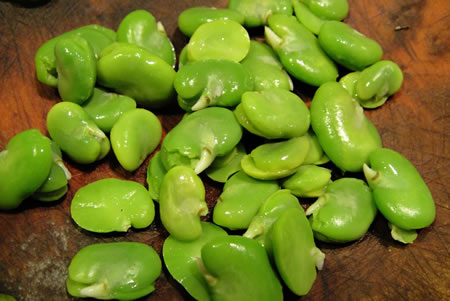
3 – When all the beans are shelled reserve in a bowl and place 1/3 cup of olive oil in a pan with a pinch of sea salt.
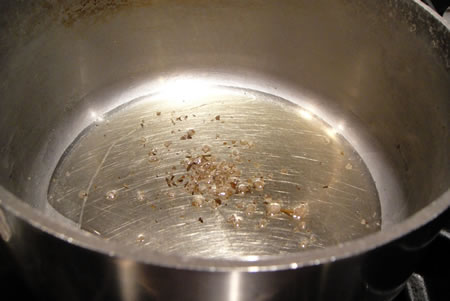
4 – Add the beans to the pan a quickly sauté until soft.
5 – Zest the lemon – reserve
6 – Cut the lemon in half and squeeze juice into the fava beans
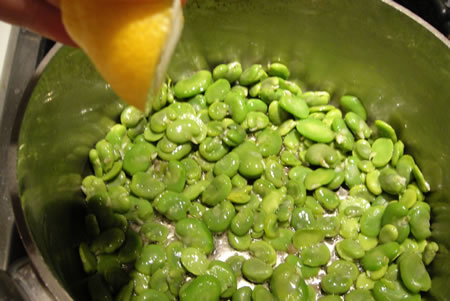
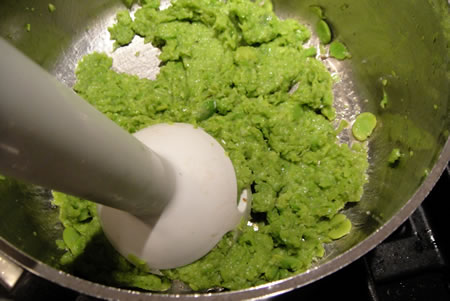
7 – Mash with a fork or better yet am immersion blender for a finer puree. You may need to add a dash of olive oil to soften the puree.
8 – Slice the baguette
9 – Toast the bread – this tastes even better if you can grill it on an open fire.
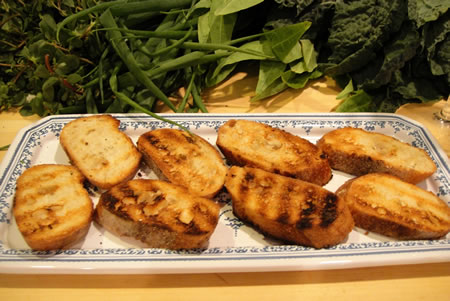
10 – Rub with a raw garlic clove on one side for a subtle flavor or both sides for a more robust garlic taste.
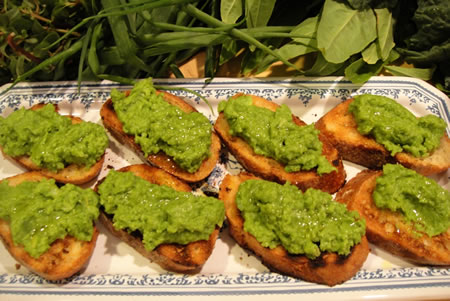
11. Spread the puree on the toast – you can drizzle additional olive oil over the top and sprinkle with the reserved lemon zest.
Serve with a green salad or sliced tomatoes. Just perfect with “a nice bottle of Chianti”
How to Eat a Fiddlehead Fern
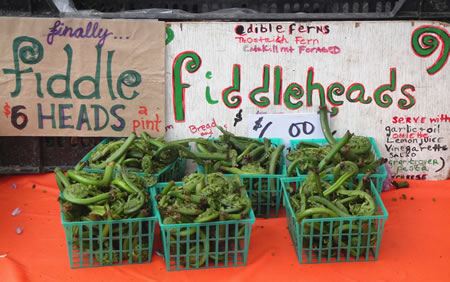
After writing my post on Ramps my dear friend Nancy Hume an actress, a teacher, and old Yankee at heart reminded me of the glories of seasonal cooking by reminiscing about her mothers Spring meals that were foraged in the fields of Martha’s Vineyard. The season started with Ramps and moved through Fiddlehead Ferns and Garlic Scapes. She still spends summers in her family home in the Vineyard and someday I’ll harvest wild grapes there. As all good foragers, she has her secret locations that she promised to take me to.
We had a wonderful discussion on Fiddleheads, comparing notes on how to serve them – it can be very simple – just sauté and eat. The Fiddlehead is a great source of Vitamin A & C and has a well rounded mineral content. Picked while still rolled in a coil before the fronds unfurl, you have to soak and wash the soil from the coiled fern. Although they are green and crunchy and are perfect sautéed – I like to feature this seasonal woodland delicacy as a main dish served over pasta or as a memorable main course salad.
Fiddlehead Ferns & Trumpet Mushrooms over Baby Spinach
2 Baskets of Fiddle heads
1 lb. Assorted Mushrooms
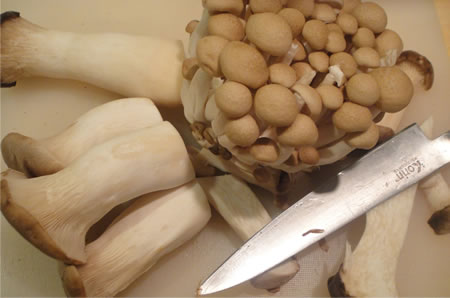
I used two Japanese varieties of Trumpet mushrooms – a Trumpet & a King Trumpet
2 T Olive Oil – or the oil of your choice
1 T Sesame Oil
Squirt of Yuzu Juice (if you have it)
Fresh Baby Spinach
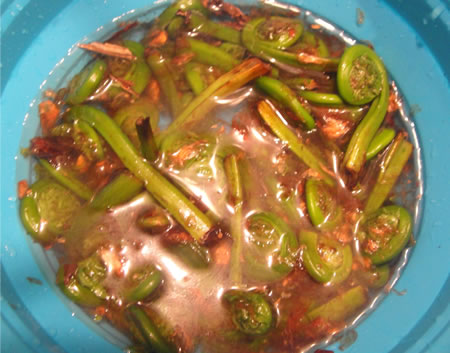
1 – Clean the fiddlehead ferns by soaking them in water for a few minutes and rinsing the soil from the coils. Dry on paper towels. Cut off the dry stems – they often are tough.
2 – Wipe the Trumpet Mushrooms clean – slice the King Trumpets length wise in insure even cooking.
3 – Add 2 T Olive Oil to a heavy sauté pan or wok – I use an antique cast iron pan that was my husband’s grandmother.
4 – First sauté the King Trumpet Mushrooms – they need more time to soften.
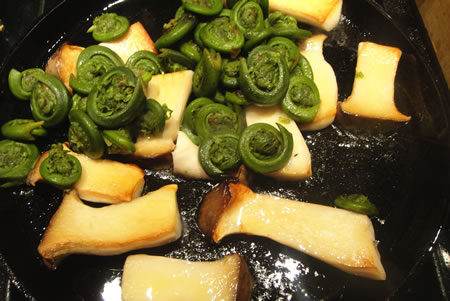
5 – When they begin to soften and turn a bit golden add the Fiddleheads. Give them a minute or two to cook and then add the smaller Trumpet Mushrooms.
6 – Quickly add 2 T of Soy Sauce – I use a low sodium. Cook one minute more.
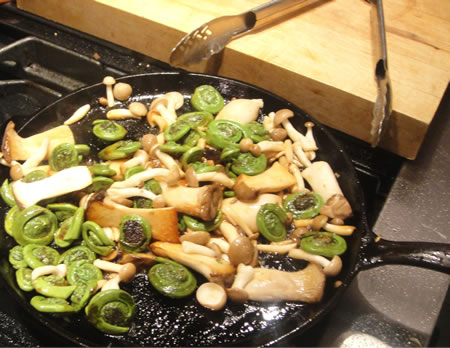
7- Just before service – add 1 T of Sesame Oil. I like the flavor very much Alternatively you can add a squirt of Yuzu Juice or Lemon if you are watching your fat/oil intake.
8 – While hot from the pan, layer over Baby Spinach greens.
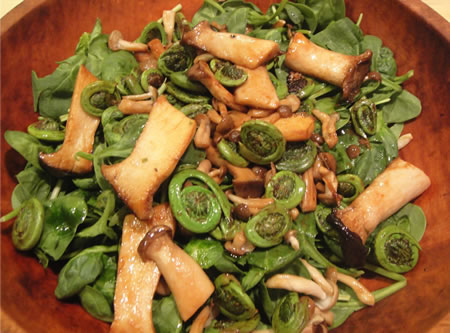
9 – Served with garlic bread or Parmesan toast points this salad makes for an exception summer lunch.
Union Square Market and Ramps
This is just the kind of day I like. Up before dawn, but who could tell because it is pouring rain. I love spring rain storms and the smell of the garden or the smell of the city streets. It reminds me of tramping thru Bloomsbury or shopping on the Place de Madeline. A rainy day in New York City is equally as special.
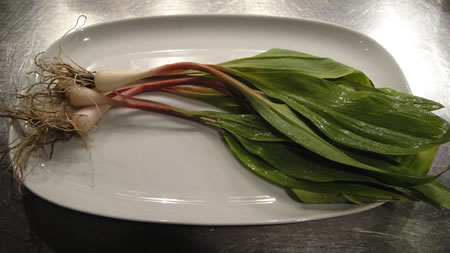
It is Wednesday in Union Square Market and the early spring has pushed forth a cornucopia of salad greens and the mighty Spring Ramps. The urban foragers go crazy for the wild ramps and the pickling, sautéing and chopping begin in earnest.
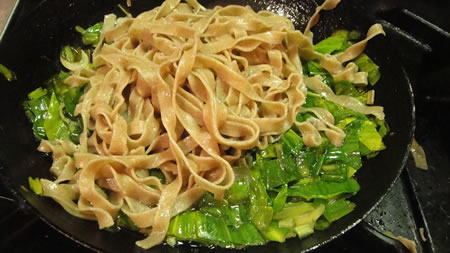
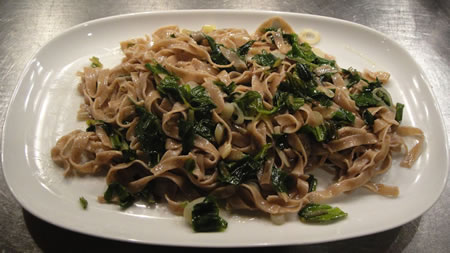
Have you ever had a pickled Ramp? It is wonderful in a martini when an onion is called for. Or along side a grilled burger. My favorite way to use ramps is in a simple pasta dish replacing the garlic with the sauteed ramps in a Spaghetti Al Olio.
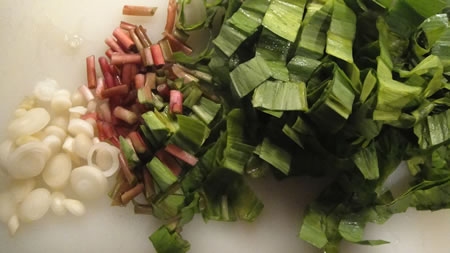
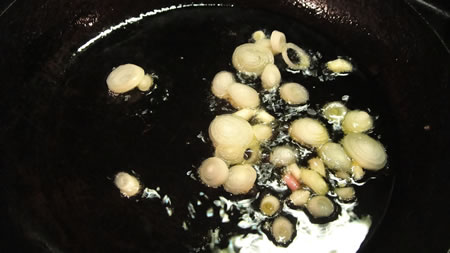
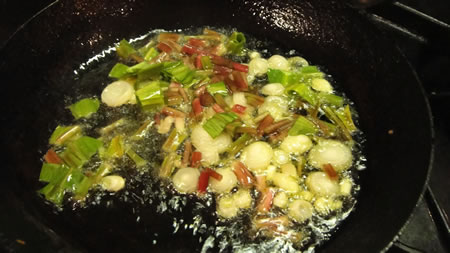
It is a wonderful primi piatti or satisfying as a late night supper. Better still my daughter relishes every fork-full. I cut up use the entire ramp, from the bulb to the glossy green leaves. Sautéing each part separately is the secret – as with all good cooking, the same size pieces cook best. By adding the same size and textured pieces to your saute pan, you will cook the ramps evenly – insuring a perfect meal. First slice the bulbs, then the shaft, then the leaves – adding each to the pan in succession allowing each part of the ramp to cook a bit before adding the next.
This meal is particularly good with crusty bread and a big green salad.
1 lb of whole wheat pasta – preferably fettucini
Two good size bunches of ramps
Olive oil – I cook with extra virgin
Sea Salt
Black Pepper
Grated Parmesan Cheese
1 – Bring a pot of water to a boil with salt.
2 – Slice the ramps – from the bulb to the leaves
3 – Cook the pasta in the boiling water.
4 – While the pasta is cooking begin sautéing the ramps – first cooking the sliced bulbs and then the stems.
5 – Drain the pasta
6- Add the ramp leaves to the saute pan and immediately add the cooked pasta.
7 – Toss with parmesan cheese and serve on a platter
Cooking with Fire: The Ultimate Cowboy Steak
We are very lucky indeed. Our country home has an fire pit fitted with an outdoor grill. It overlooks Shinnecock Bay and the cool spring evenings are perfect for watching a moonrise and sipping a martini.
Another perk is the ability to cook over an open fire all year round. A quick steak with a salad and oven fries is our usual Saturday night fare. Something delicious, easy and spontaneous that can serve my family of 3 or a feast for more if friends drop by.
One of my favorite cuts of meat is a shell steak – so I was pleasantly surprised when Andrea Geary wrote about it in the June edition of Cook’s illustrated. Although I always rub my steak with a simple version of green herbs, fresh garlic, olive oil and salt or a spicy chili rub when company calls, she suggested spicing things up with a quick glutamate paste of fish sauce, tomato paste, onion & garlic powder, and salt for one hour before cooking. She was playing with the Fifth Taste, Umami – something my father would do without knowing, when he added Worcestershire Sauce to every meal. I was intrigued.
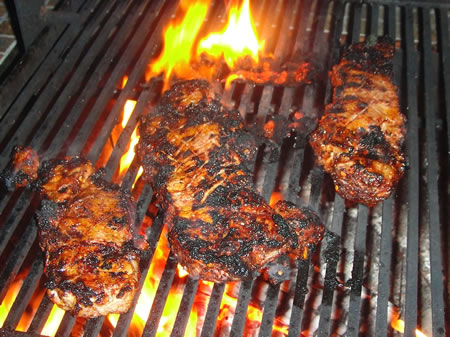
Simply – the steak is scored with a shallow slits and let sit in a marinade for 1 hour. This glutamate or Umami “marinade” changes the structure of the muscle fibers of the protein so that they hold on to more juices and it is hardly detectable to the taste. When the rub is added and the steak put to the flame, you have a wonderful, tender, delicious steak that any cowboy would be glad to call dinner.
I must say this is a step I have never tried and it makes a big difference.
Grilled Steak with Chili & Espresso
2-3 Shell Steaks
Marinade:
2 t tomato paste
2 t fish sauce
1 1/2 t natural sea salt – or kosher salt although I prefer sea salt
1/2 t onion powder – something I never use but stay with me
1/2 t garlic powder – again, something I never use but it will make a difference
Spice Rub:
2 Dried New Mexican Chilies – you can substitute an Ancho Chile if you dare
4 t whole cumin seeds
4 t coriander seeds
1/2 t cayenne pepper flakes
1/2 t black pepper – tellicherry peppercorns is my choice
1 t organic sugar
1 t finely ground espresso coffee
1t smoked paprika – hot paprika can be substituted but the smoked adds a depth of flavor
1/4 t cloves
Vegetable oil spray:
- With a sharp knife make 1/16” slits 1/2” apart in a diamond pattern on both sides of the steak.
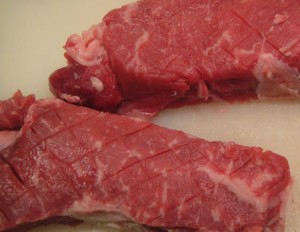
- Make the ‘marinade” by mixing all ingredients and rubbing the paste into the steak.
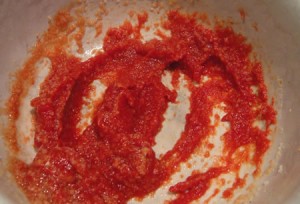
- Let sit for one hour at room temperature
- Prepare the fire 30 minutes before grilling
- Make the spice rub by toasting the first 5 ingredients for 3 to 5 minutes in a hot cast iron pan. Be care to use a vent or keep a window open as the hot pepper can cause your eyes to tear.
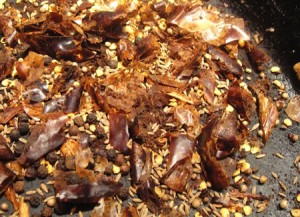
- Cool in an open bowl and add the final 4 ingredients. Grind with a spice grinder or a mortar and pestle. If you prefer a chunky rub.
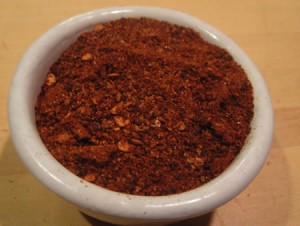
- Press 1/2 of the spice rub onto the tops of the steaks and spray with a light coating of vegetable oil. do the same to the second side.
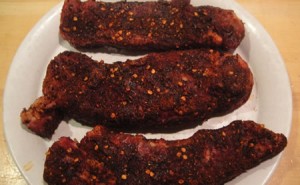
- Cook over a hot fire until brown and charred – about 3 to 4 minutes per side. The steak should register at 125 to 130 degrees for medium rare.
- Tent with aluminum foil for 10 minutes – this is an important step that is often forgotten.
- Slice thin against the grain
Visiting LA Restaurants
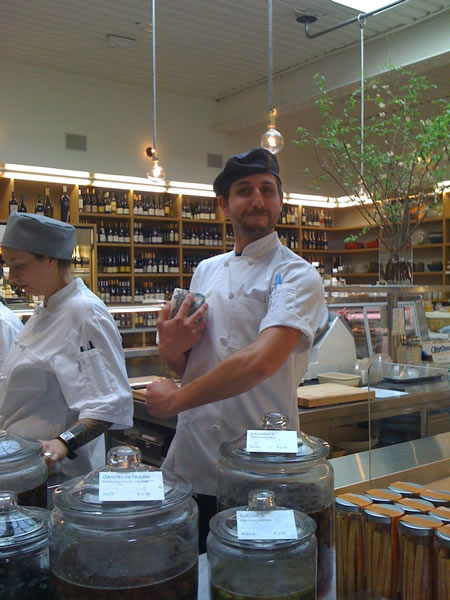
Earlier in the month I was in Los Angeles visiting my good and gracious friend Nancy on my way to the TED conference. We toured neighborhoods, shopping streets and farmers markets, enjoying the wonderful weather and delicious food. There seems to be a trend of white table restaurant chefs opening smaller, cozier, simpler spaces. Jeffrey Circiello, formerly a member of the casual dining team at French Laundry does an out standing job at Farm Shop – where the dining and shopping experience come together under one roof. At Short Order, Nancy Silverton of La Brea Bakery and the late Amy Pressman of Pasadena’s Old Town Bakery showcase comfort food and the simplicity of cooking as they would in their own homes in. Both restaurants, it is interesting to note, are in Farmer’s Markets.
Our favorite meal by far was at Tavern – the new and well celebrated Suzan Goin restaurant , bar & grill and food shop. The restaurant brings together a fine dining room, a casual bar & grill and a coffee shop for eat ins and take aways all seamlessly under one roof. Everything about the restaurant is perfect – from the color of the room to the upholstered mustard gold couches. Even Nancy, a former decorator and developer was impressed with the feel of the room. “It’s unlike anything in LA right now – but I want to live here.” Adjacent to the dining room and bar is a perfectly stocked Larder – the food shop/cafe for casual eating, take out & catering. I am so inspired by this foodie jewel box of a restaurant. I wish we had an outpost here in NYC. By the way our meal was terrific.
We ate a number of wonderful meals – in fact one was better than the next – including our breakfast of almond croissants from The Little Door in Nancy’s kitchen over looking the Holly wood sign – ok Dorothy – your not in Kansas anymore….
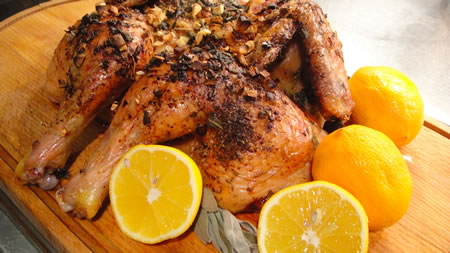
Split Chicken with Meyer Lemons and Garlic
I opened Susan Goin’s “Sunday Suppers at Lucques”, a favorite cookbook of mine. What to do tonight? Inspired by my recent trip to LA, I defrosted an organic chicken from Iaconne Farms in East Hampton, bought two containers of English peas – because one is never enough, and a couple of Meyer lemons and kumquats due to my daughters prompting…and now dinner.
Split Chicken with Meyer Lemons and Garlic
5 lbs Whole Chicken
3 Meyer Lemons
1 Onion
1 Head of Garlic
Fresh Sage Leaves
Salt
White Pepper
Herbes de Provence
1 – Cut the back bone out of the chicken- you can do this with a sharp knife or cheat and use poultry sheers then split the bird for more instruction see http://italianfood.about.com/od/tipstricks1/ss/aa051505_5.htm)
2 – Zest the 3 Meyer lemons. Reserve the zest and juice 2 of the lemons.
3 – I rinse the chicken under running water and then “wash”with Meyer lemon juice.
4 – Mix the Meyer lemon zest, herbes de provence, sea salt, chopped sage and white pepper in a small bowl.
5 -Rub well into the chicken – both front and back.
6 – Chop the onion and 1/2 the head of garlic .
7 – Pour 1 to 2 T of olive oil into a small roasting pan – add the onion and garlic. They will be your aromatics.
8 – Rest the chicken over the vegetables.
9 -Place the roasting pan in a 400 degree oven – close door and immediately and lower heat to 375 degrees.
10 – Chop the second half of the garlic into chunky pieces.
11- Roast for 20 minutes – take out the bird, begin basting and sprinkle the chopped garlic over the bird. It is important to remove the roasting pan from the oven – close the door and baste the chicken outside of the oven every 20 minutes. Doing so allows the oven to remain hot.
12 – I roast my chickens for 90 minutes – the basting interrupts the cooking time but insures a juicy bird.
13 – When the chicken is cooked – the juices run clear.
14 – Tent the chicken and rest for 10 to 15 minutes. In the mean time juice the last lemon and drizzle the juice over the carved chicken pieces.
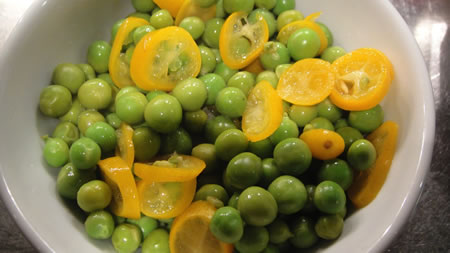
Easy Peasy English Peas with Kumquats
What shouts Spring more than English Peas? nothing! Absolutely nothing. Their season is short so cook them when you can. Traditionally they are cooked with mint and butter. But what about kumquats? The colors are so spectacular together – it has to be good.
1 lb. of Fresh English Peas
9 to 12 Kumquats
Pitch of Sea Salt
Pat of Butter -optional
1 – Slice the kumquats painfully thin – 5 to 6 slices per kumquat.
2 – Add to a pot with a scant 1/2 cup of water. Simmer on a low flame while you shell the peas.
3 – When the peas are shelled add a pinch of sea salt to the simmering water and then add the peas.
4 – Cover and cook longer than you think – about 4 to 5 minutes – the peas should still be bright green and not a bit grey.
5 – You can add a pat of butter to the pot – but I find them delicious as is. A nice change from mint and equally as fresh.
Green & Yellow Squash Gratin
Truthfully, I have to clean out my refrigerator and the yellow & green squash have to go into a gratin. This one is easy and very light – using milk and a tablespoon of flour instead of cream. Honestly if I had the cream, I would have used it – but cooking in the moment is my best at – so here goes.
2 Yellow Squash
2 Green Squash
1 T of Unsalted Butter
1/2 cup of Grated Parmesan Cheese
3/4 cup of Low Fat Milk
1 T Flour
Pitch of Salt
White Pepper
Grated Nutmeg
1- Slice the green & yellow squash on a long slim diagonal.
2 – Butter a gratin dish with 1/2 the butter.
3 – Layer the squash alternating with a layer of grated parmesan cheese.
4 – when finished, wish the milk, flour, salt, white pepper, and nutmeg in a bowl and pour over the gratin.
5 – Bake in a 350 degree oven for 20 to 30 minutes – when the top is golden.
6 – Lets cool for 5 minutes and slice into serving pieces with a sharp knife and serve with an off set spatula.
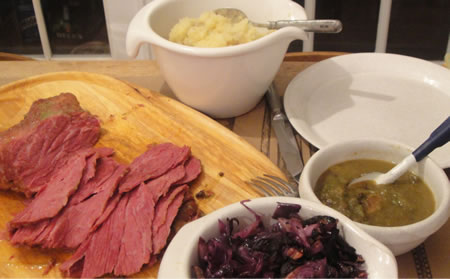
Corned Beef with Rhubarb Sauce
The winter seems to have passed with out much notice here on the east coast. There was no snow to speak of and my garden soil never froze. In fact I have 5,000 pot holes where a gang of very fat squirrels have dug up and eaten all of my spring bulbs. The funny thing is – I have a Feist – a dog that is bred to hunt squirrels in trees. Both George Washington and Thomas Jefferson had such dogs and wrote fondly of their hunting skills. But my dog “Lucky” has been reduced to fear – hiding under a bush in the corner of the garden as the gang of squirels – who are far to big too climb the trees – – picnic on my bulbs.
But there is always hope in the early spring garden. My witch hazel is in full bloom, as is the crocus and the snow drops. Before you now it the apples will be in blossom and the rhubarb will be poking out of the soil. Maudy Tuesday has passed and St Patricks day is right around the corner. Corn beef and cabbage is a spring tradition in the O’Brien household and I take a very unconventenial approach to my preparation having had many boiled dinners in my life.
I look forward to celebrating St Patrick’s Day with this dinner each year. The recipe is flavorful and surprisingly lean with a nod to a tradition. The beauty of the dinner is the flavorful rhubarb sauce accompinied by smashed yukon gold potatoes and sauted red cabbage and garlic. it is just about the most perfect perfect way to welcome spring.
This dinner takes a bit of planning but is well worth the effort. Corned beef is a type of salt-cured beef. The term comes not from the grain corn, but from the treatment of the meat with “corns” of salt. Due to the ubiquity of salting beef for preservation in many cultures, corned beef features prominently as an ingredient in many cuisines, including the Jewish, Irish American, and Caribbean cuisines. First order a thick cut organic corned beef preferably with no nitrates. Worth the trouble, potassium nitrate is added to keep the meat a bright pink color – I’d rather do without it. Whole Foods or Natures Way feature several organic – no nitrate brands.
Corned Beef with Rhubarb Sauce
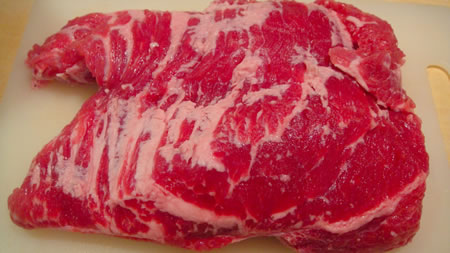
4 to 5 lb Corn Beef – preferably organic with no nitrates
4 to 6 cups apple cider
2 lbs fresh or frozen rhubarb – cut into 1” pieces
2 T Garam Marsala Spices
First trim every visible piece of fat off the corned beef. Some of you may not agree – but there is enough fat between the meat to keep the corned beef tender.
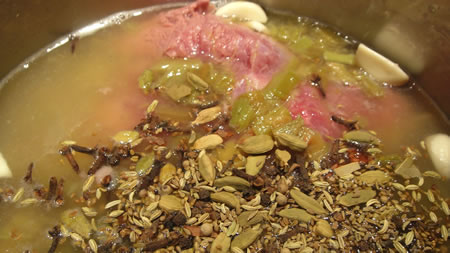
Pour 4 cups of apple cider – enough to cover the corned beef in a dutch oven. Add 1/2 the chopped rhubard.
Heat the liquid and add the trimmed corned beef and the rest of the rhubarb.
Sprinkle in 2 T of the spice mix. Cover and cook on a medium heat until the “sauce” spits and boils.
Uncover and simmer for 60 to 90 minutes until all the fat is rendered off the corned beef and your rhubarb sauce is as thick as custard.
Take the meat from the pot and let it rest “tented” under foil for 10 minutes. The apple cider and rhubarb tenderize the meat in the cooking process.
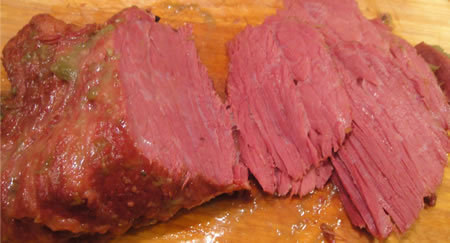
When serving, slice the corned beef at a severe angle and serve with rhubarb sauce and dijon mustard.
Leftovers make excellent open face sandwiches.
Smashed Yukon Gold Potatoes
3 pounds of Organic Yukon Gold Potatoes
2 T butter – I prefer Organic
1/2 to 1 cup of milk – I prefer Organic
Natural Sea Salt
White Pepper
Fill a 4 qt pot with water. Add a generous pitch of natural sea salt
Wash and quarter the potatoes
Boil the potatoes until fork tender – about 30 minutes
Drain the pot of the boiling water and it place back on a very gentle heat to dry the pot and potatoes.
Add 2 T unsalted butter – cut these into small pieces to melt quicker
Smash the potatoes with an old fashioned potatoe masher.
Slowly add milk while continuing to smash the potatoes – Yukon Golds are surprisingly soft and creamy – you really won’t need much milk
Test for salt and add some white pepper
Other variations:
If you would like you can add a few cloves of garlic to the boiling water to make a Garlic Smashed Potatoes
If fresh herbs are on hand, a generous sprinkling of finely chopped parsley adds a fresh flavor.
If calories are not an issue – salt pork or bacon is a wonderful old world addition
Red Cabbage Sauted with Garlic
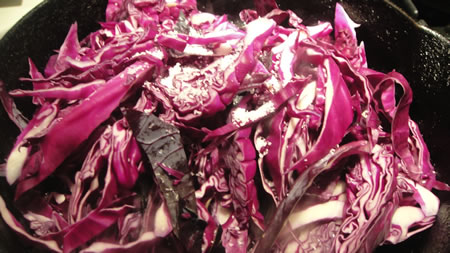
One of the easiest vegetables is sliced red cabbage sauted with garlic – the color looks glorious and the flavor is tastefully delicious
1/2 a head of Red Cabbage
Natural Sea Salt
Garlic
Olive Oil.
The trick here is to slice the cabbage as fine as you can – a rough chop is fine but for a truey spectacular dish use a mandoline or cuisinat with a fine shreadding disk
Add enough olive oil to just about cover the bottom of a cast iron frying pan.
Add 4 to 6 chopped cloves of garlic – cook until lightly gold – don’t over cook
Add the red cabbage and a good pinch of salt
Saute – turning every few minutes on medium heat.
Cook until tender and when the cabbage is slightly limp.
So Cupid walks into a Bar
So Cupid walks into a bar – assuming a guy with wings could get a drink at a bar – what would he order? I believe he would have to be in Venice. The Venetians are tolerant of so many legendary characters that I am quite sure Cupid would have no problem being served. After all, didn’t Casanova escape from Piombi Prison in Venice with the aid of his paramours – the only prisoner to escape the Doge’s prison…ahh love and Venice!
 Harry’s Bar, where the classic Belini was created, is the best in Venice. The world for that matter. Here’s a take on this favored cocktail inspired by the thought of Cupid strolling into Harry’s Bar in February when Blood oranges are in season:
Cupid’s Choice
12 oz Prosecco
3T Blood Orange Marmalade
1/4t Grenadine –even the traditional Bellini had a hit of raspberry or cherry juice to give the cocktail a pink glow.
Simply pour 12 oz of Prosecco into a cocktail mixer and stir in the Blood Orange Marmalade and grenadine. Strain and serve straight up in a champagne flute or over ice in a highball glass.
A non- alcoholic version can be made with club soda adding a touch more marmalade for a light refreshing beverage.
Flourless Valhrona Chocolate Cake
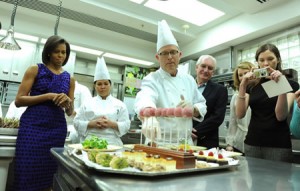 Valentine’s Day means exactly one thing to me – Chocolate. And I am not faint of heart. I like a good bittersweet rich dark chocolate, preferring cake to candy. About 6 or 7 lives ago, I worked as a cook in the kitchen at Bouley in New York City. I was Garde Manger and loved being called Madame Canape by the Chef . Bill Yosse was the Pastry chef – and he made a chocolate cake that was legendary. I think I ate one every day for a year. Bill has been the pastry chef at the White House under the Bush and Obama administrations and I love following his recipes whenever he shares them.
But back to the chocolate cake. This is plain as can be with a rich texture and a deep chocolate flavor. A cinch to make, the key is choosing and gathering the right ingredients. When making anything chocolate, choose the very best…I love Valhrona for it’s deep bittersweet chocolate flavor. In my opinion Valrhona Le Noir 68% is the perfect chocolate. Valrhona is a French chocolate manufacturer in the town of Tain-l’Hermatage in Hermitage, the wine growing district near Lyon. Their focus is on high grade luxury chocolate and considered one of the foremost chocolate makers in the world. Valrhona produces “vintage” chocolate made from beans of a single year’s harvest from specific plantations primarily from the Gran Crus which grow in South America, Oceania, and the Caribbean.
Not unlike a good bottle of wine each chocolate brand has it’s own unique flavor – Callebaut from Belgium, and two American brands Scharffen Berger and Ghirardelli are also worth considering. And if you are hungry for chocolate and have only a bag of chocolate chips in your pantry, by all means go ahead and make the cake. It will be far superior to anything store bought. I know it sounds as if I am contradicting myself. But this cake is delicious and tastefully chic any way your slice it.
Flourless Valhrona Chocolate Cake
1 Pound Valhrona Dark Chocolate
10 T European style butter – it makes a difference in baking
4 Large eggs
1 T Sugar
1 cupHeavy whipping cream
¼ t Bourbon Vanilla Extract
Baking Notes: Bring all ingredients to room temperature before mixing: eggs & whipping cream should be at room temperature , the butter should be soft. The chocolate should be melted then cooled to room temperature.
Preheat the oven to 375 degrees
Butter the bottom and sides of an 8” spring form pan & line the bottom with parchment
Chop your chocolate into small pieces and melt in a double boiler
Add the butter one tablespoon at a time to the chocolate and stir to melt.
Bring the chocolate & butter mixture to room temperature. (If you are in a hurry you can put this is the refrigerator for 10 minutes)
Whisk the eggs and the sugar with an electric mixer until they are light and tripled in volume – about 5 minutes. The mixture should produce soft ribbons of batter – do not over mix. This can also be done by hand.
Fold 1/3 of the egg mixture into the chocolate – do this by hand as to not loose volume. This is called lightening the batter. Then fold the chocolate into the egg mixture.
Place the mixture in the prepared pan. Bake until set 18 to 25 minutes
Cool on a wire rack. Remove sides of pan – and invert on a serving dish.
Chill
When ready to serve whip the heavy cream until soft peaks form – and I do like adding a drop of vanilla.
