From Recipes
“Gee, Your Pancakes are Terrific”
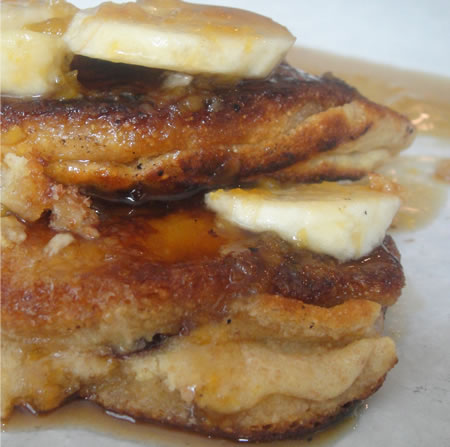
Living a good life is like flipping pancakes. If you hesitate, it splatters all over the place.
Mr Simpson may be right – it takes a bit of a quick wit, a sure hand and a practice to make a perfect pancake – much like the perfect life. A dissertation on life is quite beyond me. But the perfect Sunday pancake – this is where I have some knowledge.
I love the idea of desert for breakfast – especially on a holiday, a lazy Sunday, or when we have guests – and it surely pleases the child in us all. We love chocolate but a candy bar for breakfast is a bit decadent, although I have been known to enjoy a piece of dark chocolate with my morning coffee.
After pondering the conundrum – why not chocolate chip pancakes? With bananas – a current favorite and maybe a tricked out maple syrup and marmalade drizzle. Now your talking – a dash of vanilla and a pitch of cinnamon could round out the flavors. Sappy and wonderful just like sticky buns – but that’s another blog.
For a special spring brunch or special occasion they do blow the blueberries out of the park – but why not go one step further – heat the maple syrup and add a bit of bourbon the the marmalade. Just don’t serve it to the kids – we’ll not cross any lines here.
We love them – even my husband who doesn’t eat desert loves them and most of all. Jo and Lucky beg for more.
Chocolate Chip & Banana Buttermilk Pancakes with Marmalade Scented Maple Syrup
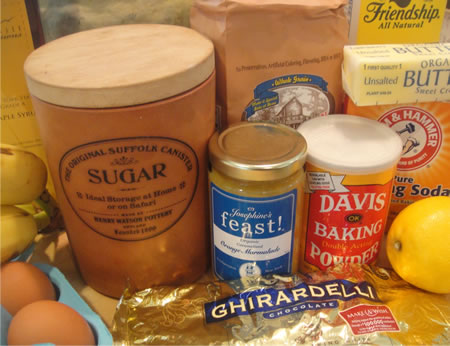
Ingredients for Recipe
3 Cups Whole Wheat Pastry Flour (All Purpose will do but I choose Whole Wheat)
1 T Baking Powder
1/2 t Baking Soda
1/4 t fine grain sea salt
2 t organic sugar
Zest of 1 lemon
1/2 t vanilla
4 T Butter (Melted & cooled – I often clarify my butter to remove the milk solids)
2 3/4 cup Buttermilk
4 eggs
1/2 cup dark chocolate chips
4 ripe banana’s thinly sliced
Clarified butter for cooking (it’s easy and cooks at a higher temperature due to the removal of the milk fat)
Saucy Syrup
1 cup maple syrup
2 heaping T Blood orange or other marmalade
Optional
A dash of Cinnamon
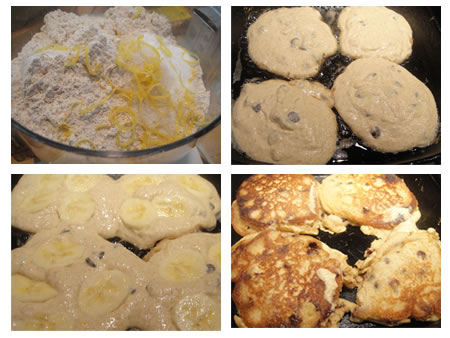
Pancake Preparation Steps
- In a food processor whiz all ingredients for the pancakes except the chocolate chips and bananas
- Scrape bowl and whiz again – you may need a bit more buttermilk if the batter is too think
- Heat a cast iron skillet or griddle and drizzle a healthy dose of clarified butter to the pan
- when the pan is hat and not quite smoking drop 1/3 c (you can use a ladle, a measuring cup or an ice cream scoop for this.)
- As soon as the edges go firm add a few slices of banana and a spoon of chocolate chips.
- Cook for a minute or two and when the sides go golden – flip and continue cooking.
- Stack cooked pancakes of a warm plate.
- As the pancakes are cooking heat the maple syrup and the marmalade. Stir – being careful not to burn the syrup. Turn the fire off and keep warm
- To serve – stack 3 to 4 pancakes with the left over banana slices.
- Pour the warmed marmalade and Maple syrup over the pancake stack
- As an option sprinkle with cinnamon
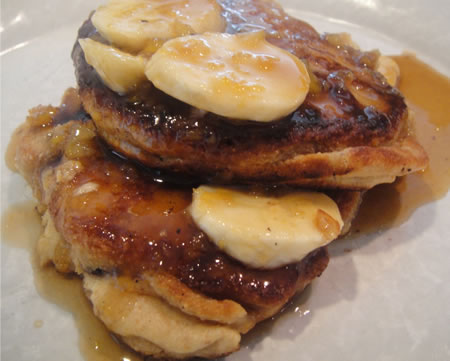
This recipe makes 30 pancakes – but the recipe can be cut in half or saved for the following day. I think pancake batter always tastes best the second day.
My Bliss Point – Upside Down Cake
 My Sunday was sideswiped by the cover article of last weeks NYT magazine, “The Extraordinary Science of Addictive Junk Food” by Michael Moss . A fascinating expose of how large food brands seduce our senses with fast, easy to prepare (or pack, as in the case of Lunchables ) engineered “food”.
Building a product that tests high and bringing consumers to their “Bliss Point” is the goal. Addicting them to fat, sugar and salt is how you measure success. Consumerism at it’s best and maybe most dangerous. But sales soar and brands grow. I don’t usually stand on a soap box pontificating about the horrors of engineered food. We all are lucky enough to make choices, and so much of success in life is about good choices. If you have the time I would recommend that you read this article.
But what is a real life “Bliss Point”?
We all have blissful food memories – a Sunday supper or home baked pies, an insane burger or a perfect Maraschino-cherried Manhattan at a cozy bar.
For me, it was my mother’s sunday roast beef dinner. When it was a “special” dinner, it was always followed by a magical pineapple upside down cake that filled the air with the scent of caramelized sugar and tropical fruit.
The cake was a visual delight – plotted rings of pineapples stuffed with bright red maraschino cherries. There was something so exotic and wonderful about the smell of pineapple and caramelized sugar with a suggestion of cinnamon. The drama of turning out the cake was always a theatrical moment with lots of fuss and bravado. The pan was flipped on a dinner plate revealing the glorious design of the pineapple rings. The burnt sugar glaze dripping down the side of the soft white cake. The gesture of the flip was usually reserved for my father – as it took some strength to flip the hot pan and not drop the dinner plate as the cake surrendered. If we were lucky, my mother would serve it al la mode with a scoop of vanilla ice cream. And yes, to my 10 year old experience it was it was perfectly blissful.
My recipe is adopted from my mother’s with a bit more bravado than even my father could achieve. I chose to substitute star fruits for the pineapples and I added bananas and blood orange marmalade along with cardamon and nutmeg to the cinnamon and vanilla. I really changed the recipe – to enhance my adult bliss. But you can add and subtract as your own flavor profile suggests. I tried this out at a casual saturday night dinner when Sean & I had invited guests. Lets just say it fast and easy to prepare – the perfume of the citrus and spices filled our home and the theatrical flip of the upside down cake was not wasted on Stephen who adores an operatic gesture at the Met or where ever he can find one.
A Cold Winter’s Night Star Fruit & Banana Upside Down Cake with Blood Orange Marmalade
Ingredients:
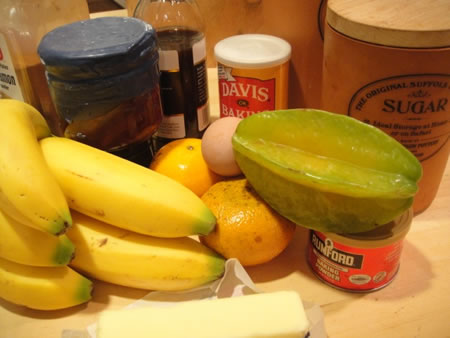
1/2 cup blood orange marmalade – we use Josephine’s feast! Fine Cut Blood Orange Marmalade. But any marmalade will do
1 star fruit – 1/2 slices
2 1/2 cups thinly sliced organic bananas
8 tbsp. butter
1/2 cup sugar – I prefer organic, along with being healthier it has a rich warm color
1 egg
1 T vanilla
3/4 t cinnamon
1/2 t cardamon
1/4 t nutmeg
1-1/3 cups cake flour
2 tsp. baking powder
1/2 tsp. fine grain sea salt
1/2 cup milk
whipped cream or ice cream (optional)
Directions:
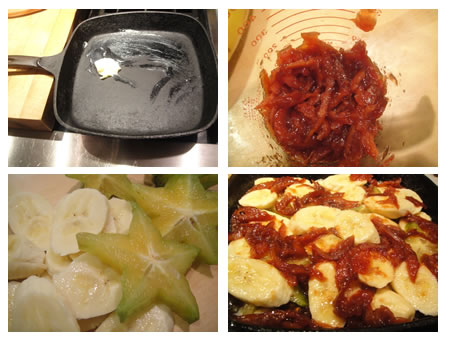
Prepare the Skillet – Slice Fruit – add Marmalade
Preheat the oven to 350 degrees.
Butter a 10 inch cast iron skillet.
Heat the pan over the stove top and spread the marmalade evenly over the bottom of the pan.
Place the star fruit in simple pattern and add the banana slices covering the marmalade – but allowing the rind to show thru.
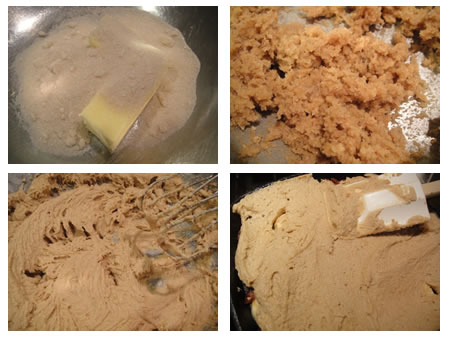
Preparing the Batter
Cream the butter and sugar together until light and fluffy. I use a hand mixer for this as my mother always did
Continue to beat while adding the egg, vanilla, and spices.
In a separate bowl, sift together the flour, baking powder and salt.
Alternately add the dry ingredients and milk to the butter mixture, a bit at a time, then stir until just combined.
Pour the batter evenly and completely over the fruit that line the skillet.
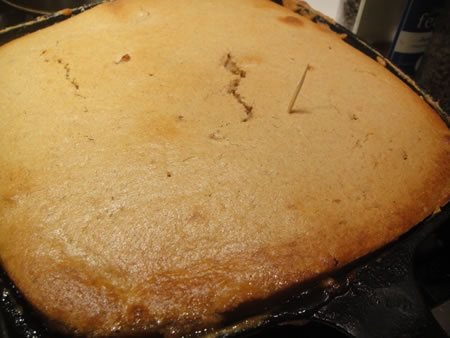
Bake for 40 to 60 minutes or until a wooden toothpick inserted in the center comes out clean.
Remove the cake from the oven and allow to cool for 10 minutes.
Loosen the cake from the skillet by running a knife around the edge of the pan.
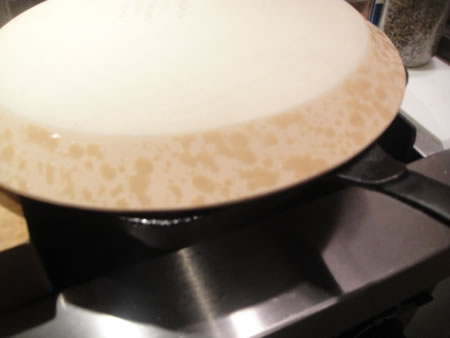
Get Ready to Flip!
Invert a serving platter over the cake and turn over so that the cake rests on the platter. Gently lift the skillet, the fruit and marmalade layer should now be on the top of the cake.
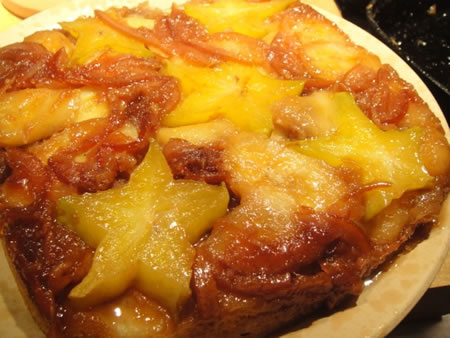
Star Fruit, Banana and Marmalade Upside Down Cake
Serve with whipped cream or ice cream if desired. But this is a beautiful cake with a desert wine by a winter fire. Serves 8 to 10.
Giving Thanks for Turkeys, Leftovers and Hurricane Hot Pepper Preserves

Unconcerned Wild Turkeys in Southampton - Thanksgiving 2012
Thanksgiving is that easy holiday – it feels as comfortable as a warm fire on a cool fall evening. A bit more laid back than most – it has always been my husband Sean’s favorite day. A casual feast with family and friends – what could be better?
After the upheaval of Sandy – I feel the exact same way. A loss of power and a few days stuck at home is a small price to pay when so many have lost so much – we all have something to be thankful for. At Josephine’s Feast! our cooking schedule was disrupted for a week. Hurricane Hot Pepper Preserves were on the schedule and is something I love to make. Just after Irene hit last year, Quail Hill Farm in Amaganset had an amazing assortment of hot peppers standing defiantly on the vine long after the hurricane had left. I thought the peppers were outstanding little devils to resist the storm and set out to harvest all that I could. In the kitchen our first vintage of Hurricane Hot Pepper Preserves was born. And it was amazing.
I waited patiently this year watching the peppers ripened on the vines on the farm and placed a substantial order with Kate the market manager at Quail Hill. We worked together at the Montauk Farmer’s Market and I told her that I had great plans for a second vintage of Hurricane Hot Pepper Preserves. I would take all the hot peppers that I could get – not realizing that history was about to repeat itself
As the day approached for my pick up, the frankenstorm was looming. Kate assured me the peppers were would be fine in her care. Packed away in refrigerators. The storm hit and it hit hard wiping out electricity on long island and nyc. It took us a week but Sean and my brother Chris finally picked up the peppers. They were just maganificent – as was Quail Hill Farm, a testament to the miracle of mother nature.
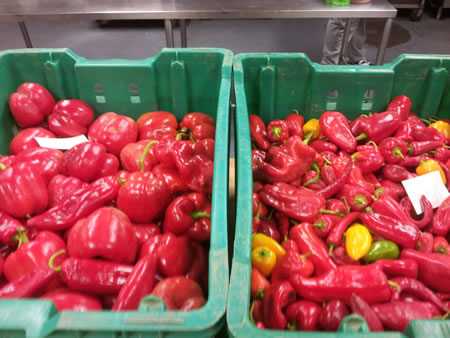
They trucked a couple hundred pounds of red hot peppers to my kitchen in Astoria, and my my staff & I car pooled over the 59th street bridge to slice, pickle, cook and preserve – what we all do best.
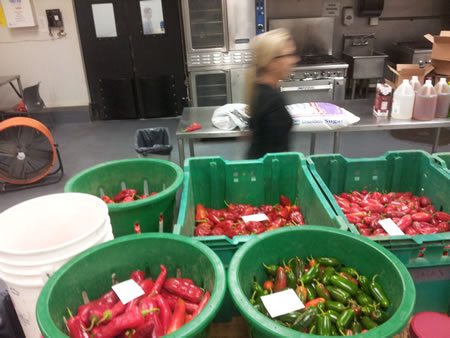
We had sweet red peppers that were so perfect it was hard to cook them – they were a masterpiece of beautiful crimson set against bright green crates. We had green and red jalepenos that we picked in a brine that was scented with anise and coriander. We had Habernaro and Pardon peppers – a Spanish hot pepper that I had never worked with. Tasting it mindlessly I realized it was far hotter than I expected and it burned my lips but had a delicious flavor. I would balance the heat of the Habernaro with the Pardon Pepper in a new preserve – a Red Hot Chili Pepper Jam. The color is a glorious red and the heat is quite strong.
And then there were the chilis – waiting to be sliced simmered in an apple cider based preserve. That would become out second vintage of the Hurricane Hot Pepper Preserve. Sean jokes that we might want to name it “After the Hurricane” – I thought why not?
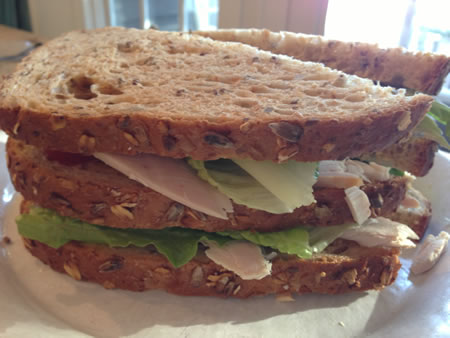
My team and I cooked, crafted and packed the hot peppers into the most wonderful preserves. And in the end absolutely nothing tastes better with a plowman’s lunch or a Double Decker Hurricane Hot Peppered Preserve Turkey Club Sandwich. This delicious mayonnaise blend is absolutely simple and turns Thanksgiving leftovers into a FEAST!
Double Decker Hurricane Hot Pepper Preserve Turkey Club Sandwich
1/4 pound Sliced Turkey Breast – leftover from Thanksgiving is best
3 slices of Rye Bread
Mayonnaise
JF After the Hurricane Hot Pepper Preserves
Romaine Lettuce
Sliced tomato
Toast the bread
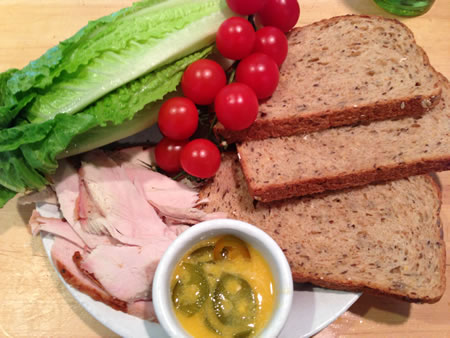
- Salt & pepper the turkey breast. My husband likes to heat the turkey slices in the pan which I find most delicious.
- Add 2T of Mayonnaise to 1T of JF After the Hurricane Preserves and mix well.
- Pull off 4 to 5 leaves of romaine and slice the tomato extra thin
- Spread the mayonnaise/pepper preserves on two slices of bread and stack bacon, turkey, tomato and romaine in that order. Add a second slice of bread and repeat finishing off with the last and final slice of bread.
- Enjoy the Feast!
As Summer Ends, So Does the Corn
A Light Wind Swept over the Corn, and nature laughed in the sunshine.
-Anne Bronte
Anne Brontë was a British novelist and poet, the youngest member of the Brontë literary family. Rather poetically, as I guess the only way a Bronte could be, she writes about corn fields in England. And this is the time of year that all conversations in our Farmer’s Markets are poetically devoted to corn. I find fresh picked corn just about the best thing in the world. Cooked simply on the grill, corn defines the summer season.
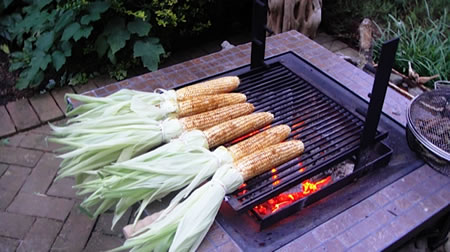
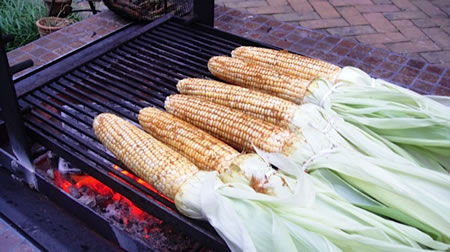
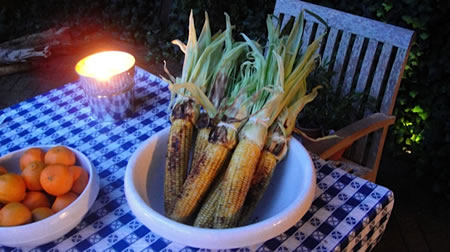
But we do reach our limits, and as the season ends, I can’t help experimenting with various herb butters and spice rubs when we bring home fresh picked corn from the Farmer’s Market . One of my favorite ways to extend my interest in the harvest is to roast or grill the corn over the fire, enhancing it’s flavor with herb butters or spice rubs. Shucking the ears and tying the husks to use as a “handle” is key, and it makes a beautiful presentation at your barbecue as well as on your table.
I have to admit any fresh herb butter will do – gather what you have in your garden if you are lucky enough to have one – oregano, thyme, coriander or anything you may have on hand. Finely chop the tender herbs and add a pinch of sea salt blending with butter to make a paste. Alternately a tablespoon of dried sage, thyme or crushed rosemary will do. Grease the corn with the herb butter and set on the grill. Roll a few times to cook all sides and serve. Do not over cook – 3 to 5 minutes is more than enough time.
Alternatively – I make a curry rub that is sensational with grilled corn. I love the way the warmth of the chili and spices flavors the corn and enhances each kernel’s sweetness. Grill to taste and to get a nice roasted color.
Simple “Curry Rub” for Corn
2 T Mild Curry Spice
1 T Dried Thyme
1/4 t Sea Salt – more of you prefer
Good quality Olive Oil
- Mix all three ingredients in a bowl
- Shuck each ear and brush with olive oil
- Rub a good amount of “curry rub” into the corn.
- Grill over BBQ coals or an open fire.
At Josephine’s Feast! we have Bridgehampton Curry Rub for Corn on the Cob that works well on corn as well as grilled vegetables – such as zucchini, squash, carrots or potatoes and even Shrimp. Give it try!
The Wonderful Blue Cheese Wedge
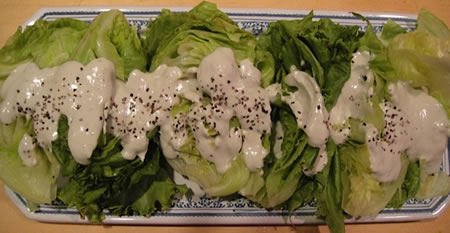
In the market, iceberg lettuce conjures up two insanely different images. The first is the iceberg of my childhood memory. A bowling ball of watery leafy greens that were just about mummy wrapped in cellophane and saran wrap on the A&P shelf and served on a plate with a dollop of plain sour cream by my Aunt Josie. She was not a cook but an exceptional God Mother and Aunt.
The second was hand harvesting my first head of heirloom iceberg at Quail Hill Farm. What a treat – so much so that I’d drive 20 miles to harvest the iceberg when the crop comes in. I dare not share my secret of the exceptional flavor of the heirloom iceberg while other share holders pick the deer tongue, boston, and other fancy lettuce heads. I wanted to be able to pick more next week. And inevitably the iceberg was still there – week after week.
Now the fun begins. I love an impecable wedge – not the the Baco’s covered wedge of restaurant chain fame – but a proper blue chesse wedge salad – with or without bacon.
My second secret is a recipe from Montrachet – where the blue cheese dressing was made with buttermilk and tarragon vinegar. Exceptional by my standards.
For this recipe – you will need a gadget. A wand is perfect but a blender or small food processor will do.
Butter Milk Blue Cheese Wedge Salad
3 small heads of heirloom iceberg lettuce – or 1 large head
1 cup of Butter Milk
1 large shallot – I prefer the torpedo shaped shallots, they are easier to peel
8 to 12 oz of Danish Blue cheese
1T tarragon vinegar. And although any good quality herbal vinegar will do – the taragon vinegar imparts the perfect flavor
Coarse Ground Black Pepper for Finishing
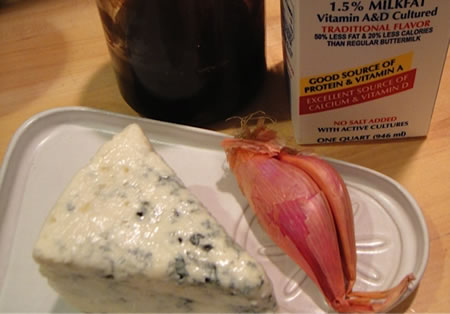 1-Measure the butter milk and set aside.
2-Roughly chop the shallots by hand.
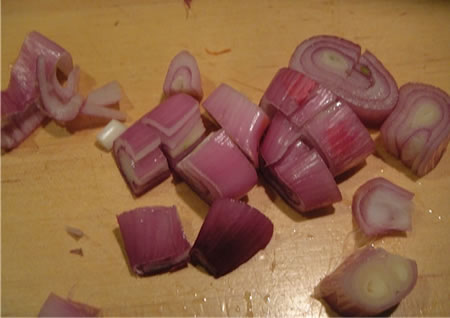 3- Add the shallots and the vinegar to a vessel and process to chop.
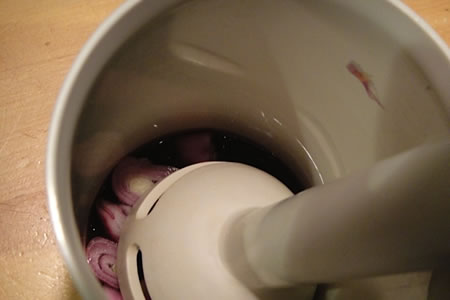 4- add the buttermilk and process adding cheese chunk by chunk continuing to process into a thick dressing
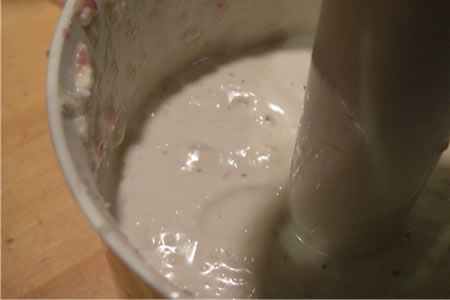 5- Taste. Drizzle in more vinegar if need be.
6- Refrigerate
7- Just before serving cut the Iceberg lettuce heads into wedges. I like the smaller heads on a long platter – lined up like soldiers on guard
8- Spoon the Buttermilk Blue Cheese Dressing over the wedges making sure it is distributed evenly. Finish with Coarse Ground Black Pepper to taste.
Buttermilk Blue Cheese Dressing is a teriffic sauce over grilled skirt steak as well. And makes a lovely main course salad.
On Making Lemonade

My daughter Josephine often sells an organic lemonade on Sunday’s at the Southampton Farmers Market. And in the City, her friends Noah and Micayla have a stand on Mercer Street in Soho where they cornered the market on one of the first 99 degree days of summer. Who can resist?
Both refreshing and satisfying – hand making lemonade is as good for the soul as it is for drinking on a hot summer day. It’s easy to do , and can be made in no time at all. Further, the customization possibilities are endless. Sliced strawberries, cherries, and even mellon balls can be added for a seasonal blend. Mint sprigs or lavender honey produce something a bit more sophisticated – maybe lending itself to a splash (or more) of vodka or even tequila.
For the best lemonade – there are a few steps to follow to guarantee a superb result.

Ingredients
12 organic lemons
1 cup sugar
Filtered water
Ice
1 – Roll the lemons between the palm of your hand and the counter – this action breaks down the fibers making the juicing a bit easier and some say it renders more juice.
2 – Cut the lemons in half and squeeze – it you have an electric juicer or a group of friends this goes faster. I use on old corning glass citurus juicer – suits me just fine.
3 – Bring 2 cups of cold water to a boil and dissolve the sugar.
4 – Add the strained juice of the 12 lemons – or simply remove the pits and keep the pulp – your choice.
5 – Add two scoops of ice to a heat stable pitcher & pour the lemonade “syrup” over ice. This will cool down the temperature of the “syrup”.
5 – Adding more cool water and additional ice to fill the pitcher.
Options (and they are endless)
• Mint springs or muddled mint
• A splash of orange juice to further sweeten the lemonade
• A hand full of berries – it gives the lemonade a pink glow.
• Sliced cucumber and/or fresh coriander
• Mellon or watermelon balls
I like to make a cocktail using fresh lemonade a few slices of serano chili and tequila – garnish with a cucumber spear & corriander. Very refreshing on a hot day.
Fava Bean Bruschetta
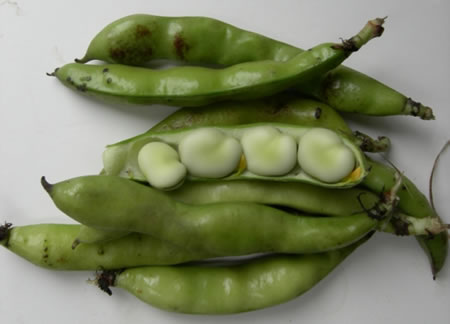
All of a sudden it hits – the markets are loaded with greens of all kinds. The bounty is overwhelming – but what I focus in on is the arrival of the Fava Beans. For me it means summer has begun.
To eat fresh Fava Beans in the early summer is the ultimate treat. They can be added to pasta or served with salt and a nice bottle of chianti as Mr Lecter may have suggested – you may want to save the liver for another day. They taste green & fresh, just perfect for a summer lunch along side a simple green salad or sliced tomatoes.
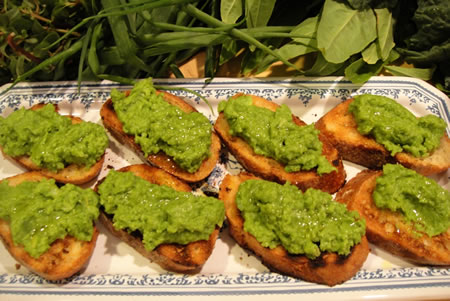
Easy to make – cooking fava beans takes some planning. You will have to peel the pods releasing the Fava Beans from the shell. I’ve had grilled Fava Beans served in the shell – but that is quite simply another recipe and should only be attempted with the freshest youngest beans. My favorite way to eat these delicious delicacies is as a brilliant green Fava Bean Bruschetta.
Fava Bean Bruschetta
2 Lbs Fresh Fava Beans
1/3 c Olive Oil plus additional oil – I prefer fresh green just pressed oil for this dish
pinch of Sea Salt
1 Organic Lemon
2 cloves Garlic
1 Baguette
1 – Shell 2 lbs of fresh Fava Beans – look for young green pods
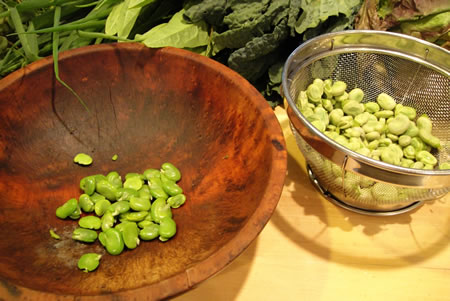
2 – Blanche the beans in a pot of salted water – a minute or two is sufficient. You want to be able to peel the beans from the shell
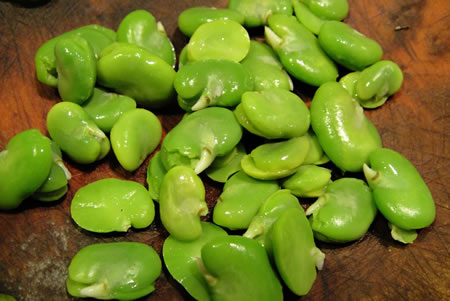
3 – When all the beans are shelled reserve in a bowl and place 1/3 cup of olive oil in a pan with a pinch of sea salt.
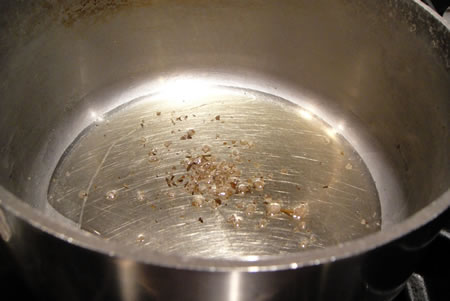
4 – Add the beans to the pan a quickly sauté until soft.
5 – Zest the lemon – reserve
6 – Cut the lemon in half and squeeze juice into the fava beans
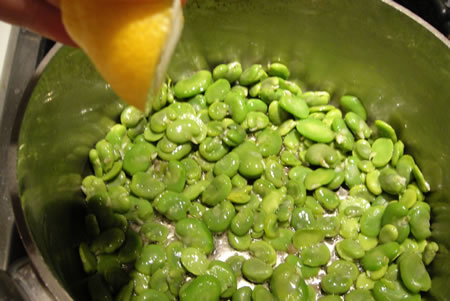
7 – Mash with a fork or better yet am immersion blender for a finer puree. You may need to add a dash of olive oil to soften the puree.
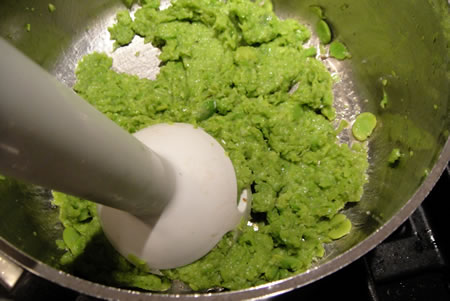
8 – Slice the baguette
9 – Toast the bread – this tastes even better if you can grill it on an open fire.
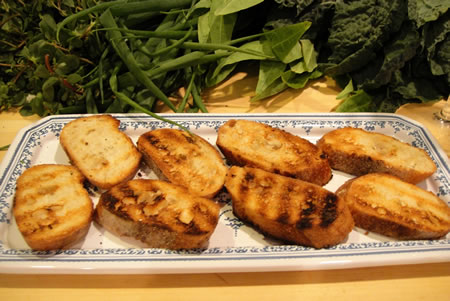
10 – Rub with a raw garlic clove on one side for a subtle flavor or both sides for a more robust garlic taste.
11. Spread the puree on the toast – you can drizzle additional olive oil over the top and sprinkle with the reserved lemon zest.
Serve with a green salad or sliced tomatoes. Just perfect with “a nice bottle of Chianti”
How to Eat a Fiddlehead Fern
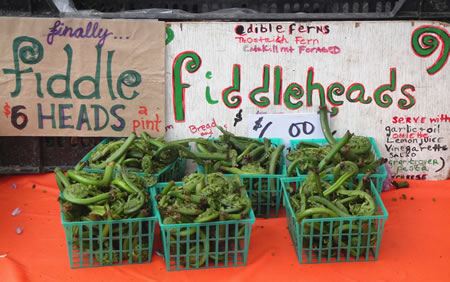
After writing my post on Ramps my dear friend Nancy Hume an actress, a teacher, and old Yankee at heart reminded me of the glories of seasonal cooking by reminiscing about her mothers Spring meals that were foraged in the fields of Martha’s Vineyard. The season started with Ramps and moved through Fiddlehead Ferns and Garlic Scapes. She still spends summers in her family home in the Vineyard and someday I’ll harvest wild grapes there. As all good foragers, she has her secret locations that she promised to take me to.
We had a wonderful discussion on Fiddleheads, comparing notes on how to serve them – it can be very simple – just sauté and eat. The Fiddlehead is a great source of Vitamin A & C and has a well rounded mineral content. Picked while still rolled in a coil before the fronds unfurl, you have to soak and wash the soil from the coiled fern. Although they are green and crunchy and are perfect sautéed – I like to feature this seasonal woodland delicacy as a main dish served over pasta or as a memorable main course salad.
Fiddlehead Ferns & Trumpet Mushrooms over Baby Spinach
2 Baskets of Fiddle heads
1 lb. Assorted Mushrooms
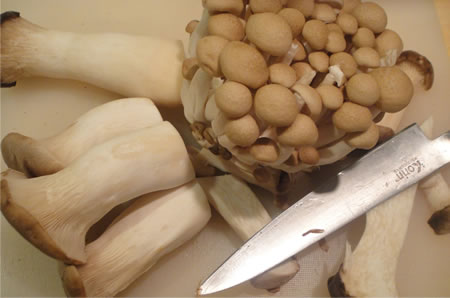
I used two Japanese varieties of Trumpet mushrooms – a Trumpet & a King Trumpet
2 T Olive Oil – or the oil of your choice
1 T Sesame Oil
Squirt of Yuzu Juice (if you have it)
Fresh Baby Spinach
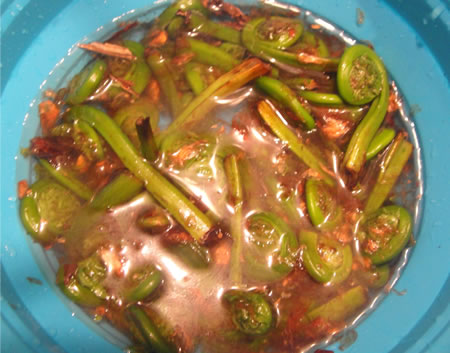
1 – Clean the fiddlehead ferns by soaking them in water for a few minutes and rinsing the soil from the coils. Dry on paper towels. Cut off the dry stems – they often are tough.
2 – Wipe the Trumpet Mushrooms clean – slice the King Trumpets length wise in insure even cooking.
3 – Add 2 T Olive Oil to a heavy sauté pan or wok – I use an antique cast iron pan that was my husband’s grandmother.
4 – First sauté the King Trumpet Mushrooms – they need more time to soften.
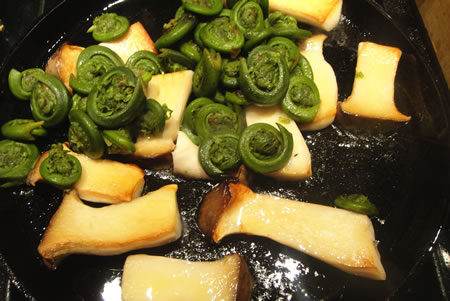
5 – When they begin to soften and turn a bit golden add the Fiddleheads. Give them a minute or two to cook and then add the smaller Trumpet Mushrooms.
6 – Quickly add 2 T of Soy Sauce – I use a low sodium. Cook one minute more.
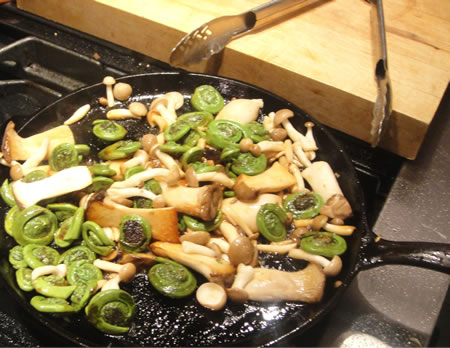
7- Just before service – add 1 T of Sesame Oil. I like the flavor very much Alternatively you can add a squirt of Yuzu Juice or Lemon if you are watching your fat/oil intake.
8 – While hot from the pan, layer over Baby Spinach greens.
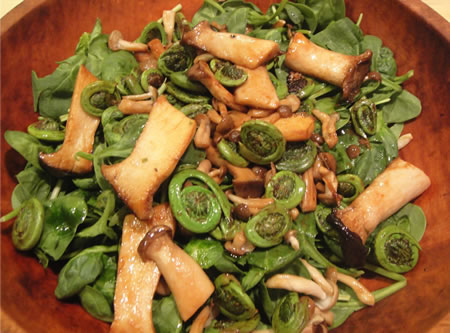
9 – Served with garlic bread or Parmesan toast points this salad makes for an exception summer lunch.
Union Square Market and Ramps
This is just the kind of day I like. Up before dawn, but who could tell because it is pouring rain. I love spring rain storms and the smell of the garden or the smell of the city streets. It reminds me of tramping thru Bloomsbury or shopping on the Place de Madeline. A rainy day in New York City is equally as special.
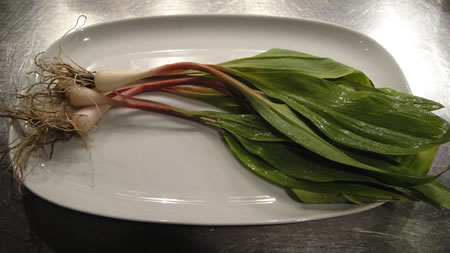
It is Wednesday in Union Square Market and the early spring has pushed forth a cornucopia of salad greens and the mighty Spring Ramps. The urban foragers go crazy for the wild ramps and the pickling, sautéing and chopping begin in earnest.
Have you ever had a pickled Ramp? It is wonderful in a martini when an onion is called for. Or along side a grilled burger. My favorite way to use ramps is in a simple pasta dish replacing the garlic with the sauteed ramps in a Spaghetti Al Olio.
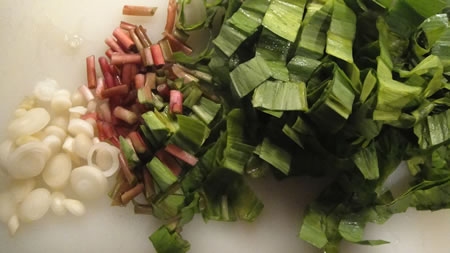
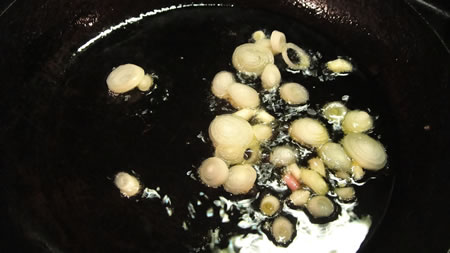
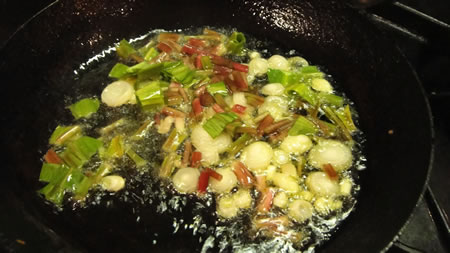
It is a wonderful primi piatti or satisfying as a late night supper. Better still my daughter relishes every fork-full. I cut up use the entire ramp, from the bulb to the glossy green leaves. Sautéing each part separately is the secret – as with all good cooking, the same size pieces cook best. By adding the same size and textured pieces to your saute pan, you will cook the ramps evenly – insuring a perfect meal. First slice the bulbs, then the shaft, then the leaves – adding each to the pan in succession allowing each part of the ramp to cook a bit before adding the next.
This meal is particularly good with crusty bread and a big green salad.
1 lb of whole wheat pasta – preferably fettucini
Two good size bunches of ramps
Olive oil – I cook with extra virgin
Sea Salt
Black Pepper
Grated Parmesan Cheese
1 – Bring a pot of water to a boil with salt.
2 – Slice the ramps – from the bulb to the leaves
3 – Cook the pasta in the boiling water.
4 – While the pasta is cooking begin sautéing the ramps – first cooking the sliced bulbs and then the stems.
5 – Drain the pasta
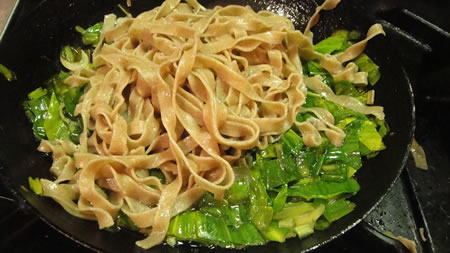
6- Add the ramp leaves to the saute pan and immediately add the cooked pasta.
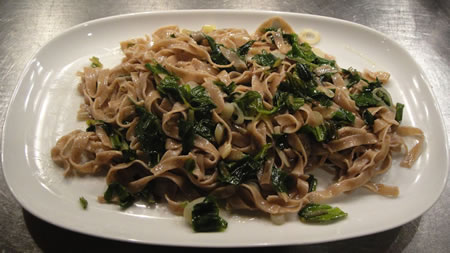
7 – Toss with parmesan cheese and serve on a platter
Cooking with Fire: The Ultimate Cowboy Steak
We are very lucky indeed. Our country home has an fire pit fitted with an outdoor grill. It overlooks Shinnecock Bay and the cool spring evenings are perfect for watching a moonrise and sipping a martini.
Another perk is the ability to cook over an open fire all year round. A quick steak with a salad and oven fries is our usual Saturday night fare. Something delicious, easy and spontaneous that can serve my family of 3 or a feast for more if friends drop by.
One of my favorite cuts of meat is a shell steak – so I was pleasantly surprised when Andrea Geary wrote about it in the June edition of Cook’s illustrated. Although I always rub my steak with a simple version of green herbs, fresh garlic, olive oil and salt or a spicy chili rub when company calls, she suggested spicing things up with a quick glutamate paste of fish sauce, tomato paste, onion & garlic powder, and salt for one hour before cooking. She was playing with the Fifth Taste, Umami – something my father would do without knowing, when he added Worcestershire Sauce to every meal. I was intrigued.
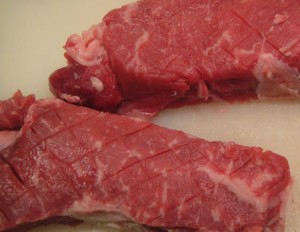
Simply – the steak is scored with a shallow slits and let sit in a marinade for 1 hour. This glutamate or Umami “marinade” changes the structure of the muscle fibers of the protein so that they hold on to more juices and it is hardly detectable to the taste. When the rub is added and the steak put to the flame, you have a wonderful, tender, delicious steak that any cowboy would be glad to call dinner.
I must say this is a step I have never tried and it makes a big difference.
Grilled Steak with Chili & Espresso
2-3 Shell Steaks
Marinade:
2 t tomato paste
2 t fish sauce
1 1/2 t natural sea salt – or kosher salt although I prefer sea salt
1/2 t onion powder – something I never use but stay with me
1/2 t garlic powder – again, something I never use but it will make a difference
Spice Rub:
2 Dried New Mexican Chilies – you can substitute an Ancho Chile if you dare
4 t whole cumin seeds
4 t coriander seeds
1/2 t cayenne pepper flakes
1/2 t black pepper – tellicherry peppercorns is my choice
1 t organic sugar
1 t finely ground espresso coffee
1t smoked paprika – hot paprika can be substituted but the smoked adds a depth of flavor
1/4 t cloves
Vegetable oil spray:
- With a sharp knife make 1/16” slits 1/2” apart in a diamond pattern on both sides of the steak.
- Make the ‘marinade” by mixing all ingredients and rubbing the paste into the steak.
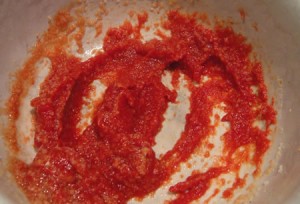
- Let sit for one hour at room temperature
- Prepare the fire 30 minutes before grilling
- Make the spice rub by toasting the first 5 ingredients for 3 to 5 minutes in a hot cast iron pan. Be care to use a vent or keep a window open as the hot pepper can cause your eyes to tear.
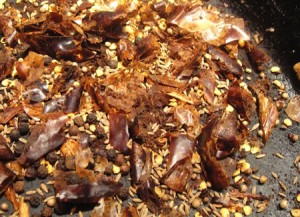
- Cool in an open bowl and add the final 4 ingredients. Grind with a spice grinder or a mortar and pestle. If you prefer a chunky rub.
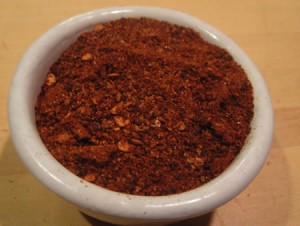
- Press 1/2 of the spice rub onto the tops of the steaks and spray with a light coating of vegetable oil. do the same to the second side.
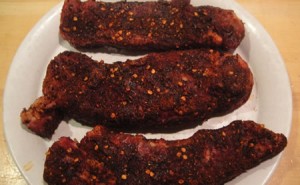
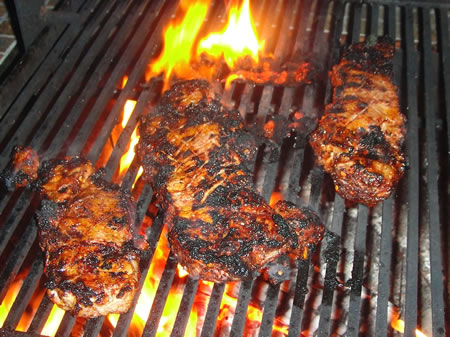
- Cook over a hot fire until brown and charred – about 3 to 4 minutes per side. The steak should register at 125 to 130 degrees for medium rare.
- Tent with aluminum foil for 10 minutes – this is an important step that is often forgotten.
- Slice thin against the grain
